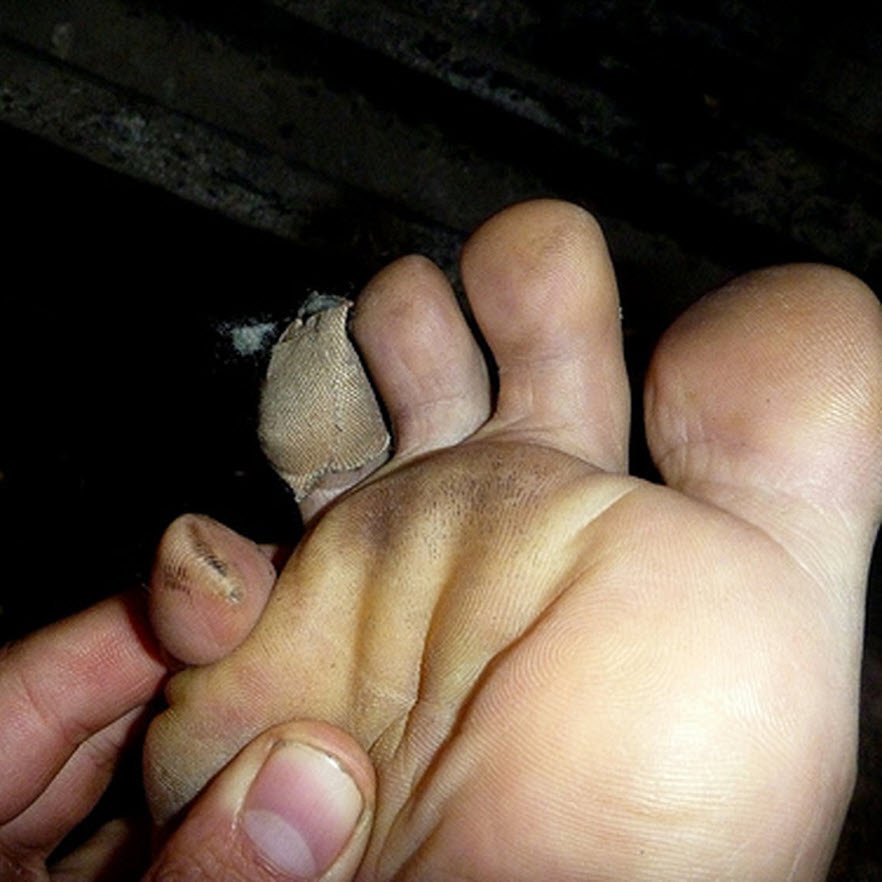
Pinch blisters can occur on any toe but are most common on the fourth or fifth toes. The toe in question is almost always curly (called adductovarus). In other words, the toe is twisted and bent such that it sits a little bit under the adjacent toe. Sometimes it sits a lot under the next toe, and is literally trodden on with every step.
What Causes Pinch Blisters Between Toes?
Officially, a pinch blister occurs underneath the toe. However, because of the twisted position, the underside now faces sideways and looks to be more between the toes. Depending on how curly the toe is, they can even be on the tip of the toe. The recurrent weightbearing pressure and pressure from the next toe sitting on it often causes the fleshy underside of the toe to become misshapen. To the point where it can be triangular! Tight shoes will exaccerbate the problem, obviously, as the toes are squeezed together. But more often than not, it's nothing to do with shoe-fit and all to do with the curly posture of the toe. Click here to learn about true interdigital blisters (blisters between toes)
How To Know If You're At Risk Of Developing A Pinch Blister
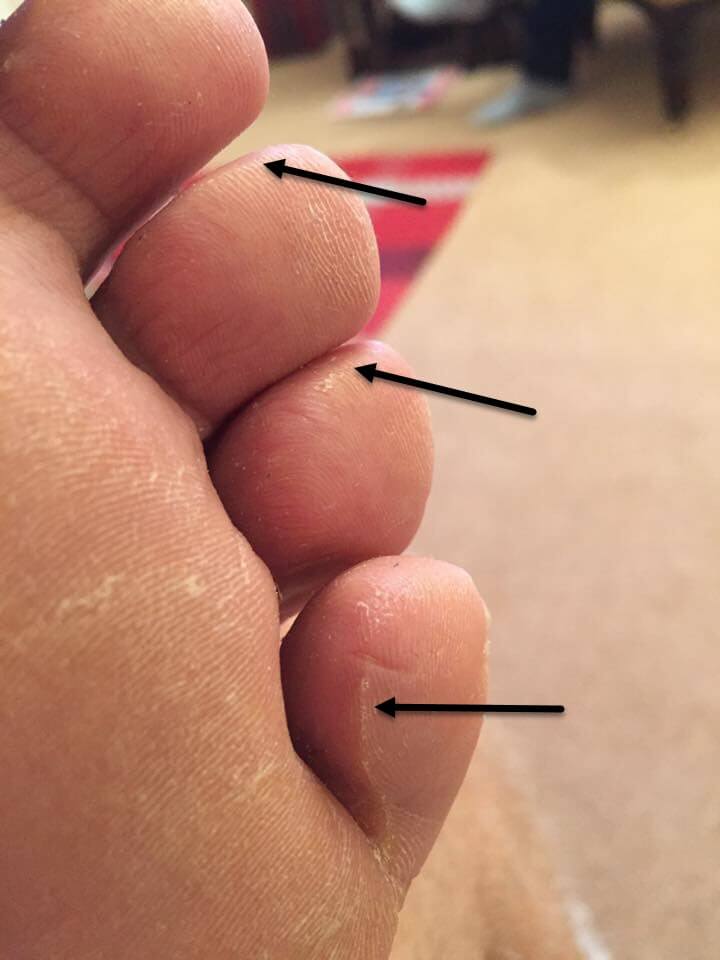
If you see a ridge of hard skin under your toes, you're at risk of developing a pinch blister. This hard skin is called a pinch callous. Callouses and blisters are both caused by recurrent shear forces. Callouses are the chronic presentation, blisters the acute presention. So if you suddenly increase your activity level, your pinch callous will likely give way to a pinch blister between your toes.


Can Pinch Blisters Develop Into Blood Blisters?
Absolutely! If the toe is recurrently trodden on by the adjacent toe with enough force, blood vessels in the dermis layer of skin can be ruptured and blood will infiltrate and mix with the normal blister fluid. We've got some photos soon that will show you.
What Do Pinch Blisters Look Like?
Not sure if the blister under your toe is a pinch blister? Here are some photographic examples to help you decide. Click on each image below if you'd like to see the larger photo. I do apologise if some of these photos offend. Some of them look a bit nasty, simply because I deal with a lot of nasty blisters in multiday ultramarathon situations. My intention is simply to help you determine if you're dealing with a pinch blister between toes or something else, so you can choose the best prevention for it.
How To Treat Pinch Blisters Between Toes
Just like treating any blister, the ideal is to leave the blister roof intact. As long as the roof is intact, bacteria can't enter the blister and cause infection. However, just like any blister that sustains weightbearing forces, it's likley that unless your activity level lessens significantly, your blister will pop on its own. It's best to not leave it to chance. If you have the right blister treatment gear, like our Sterile Blister Lance Pack, and you have the confidence to use it, it can be a better idea to lance your blister in a controlled and clean environment. That way you'll be proactive about preventing an infected toe blister.
Pinch Blister Prevention
Pinch blister prevention is all about stopping the pulpy underside of the toe in question from being trodden on. Separating the toes or holding the toes straighter is the aim of the blister prevention game. The options include:
Taping
Lubricants
Toesocks
Custom wedges/toeprops
Gel toe caps/sleeves
ENGO patches on toesocks
1) Taping
Toe taping is a good place to start. Tape helps spread blister-causing shear load a little and it might be all you need to prevent pinch blisters between toes. Simply applying tape around the toe can encapsulate the soft tissue of the toe such that it can't be squashed under the next toe quite as much. It kind of holds the flesh in and helps prevent pinch blisters. Anything that can hold this soft tissue in and less triangular, means there’s less toe that the next toe can tread on – and that means less pinch blisters. Below is a video on my toe taping technique that I learned from Anna Beetham. Fixomull Stretch is the tape I generally use. The video below shows the best toe taping technique.
Taping can also be used to hold a toe in a straighter position. Here’s a video demonstration of taping a pinky toe up and out when it normally tucks in and under the next toe.
2) Lubricants
Lubricants reduce friction. While I'm not a huge fan of lubricants for these reasons, the best place to use them is on the toes, particularly for blisters between the toes. However, because there is a large pressure component to pinch blisters between toes, and lubricants are purely a friction -management strategy, lubes may not do enough. Take a look at this video where I run through a bunch of topical blister products, including lubricants.

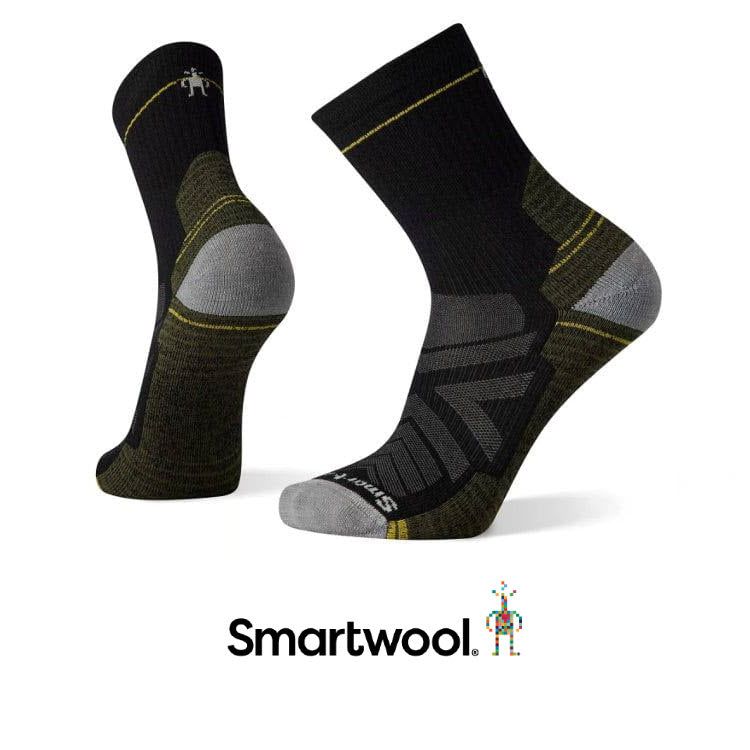
3) Toesocks
Toesocks add cushioning to every interdigital space where normally there is none - it's normally skin on skin. Toesocks are very popular in running and hiking and are a genuine chance at preventing pinch blisters between toes. The most common and by far the best brand of toesock is Injinji. If you're interested in Injinji toesocks, read this helpul article.
4) Custom Wedges Or Toeprops (made by your podiatrist)
Otoform K is a moldable putty material that sets and holds its shape. Podiatrists use it frequently to change the way toes sit, move and press against one another, in spite of even the most significant toe deformities. Essentially, we're trying to reduce pressure and reduce the movement of the toes. You need to be standing while the material sets – because non-weightbearing toe alignment is different to weightbearing alignment. The good thing about Otoform K is it’s long-lasting (at least 6 months) and is easy to keep clean. However, they aren’t always tolerated - in a minority of cases they can feel hard and foreign. The video below shows me making a prop (a bit more involved than a simple wedge) for my toes – just so you can get the idea.
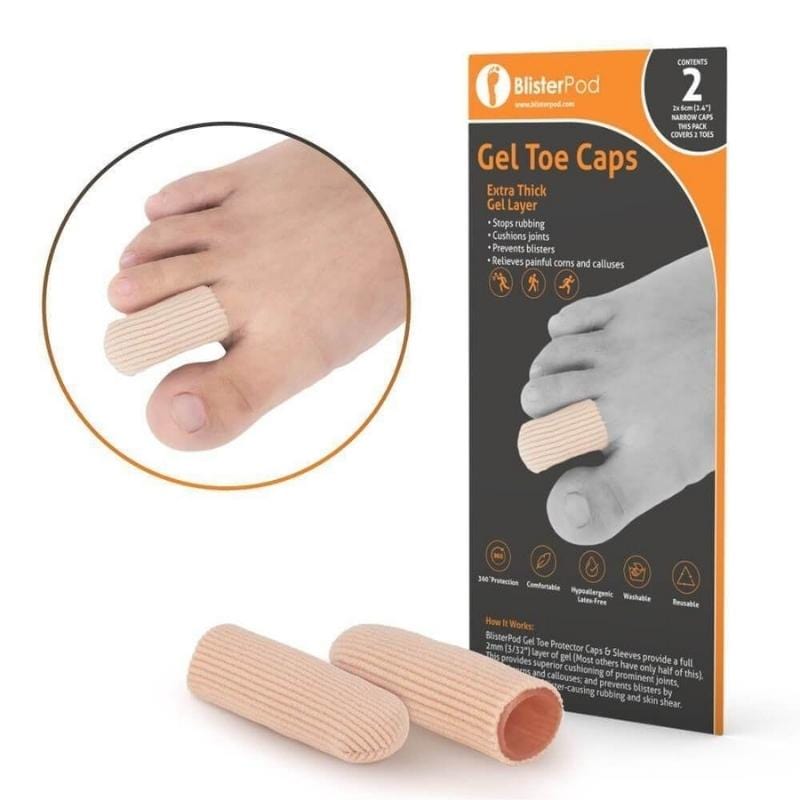
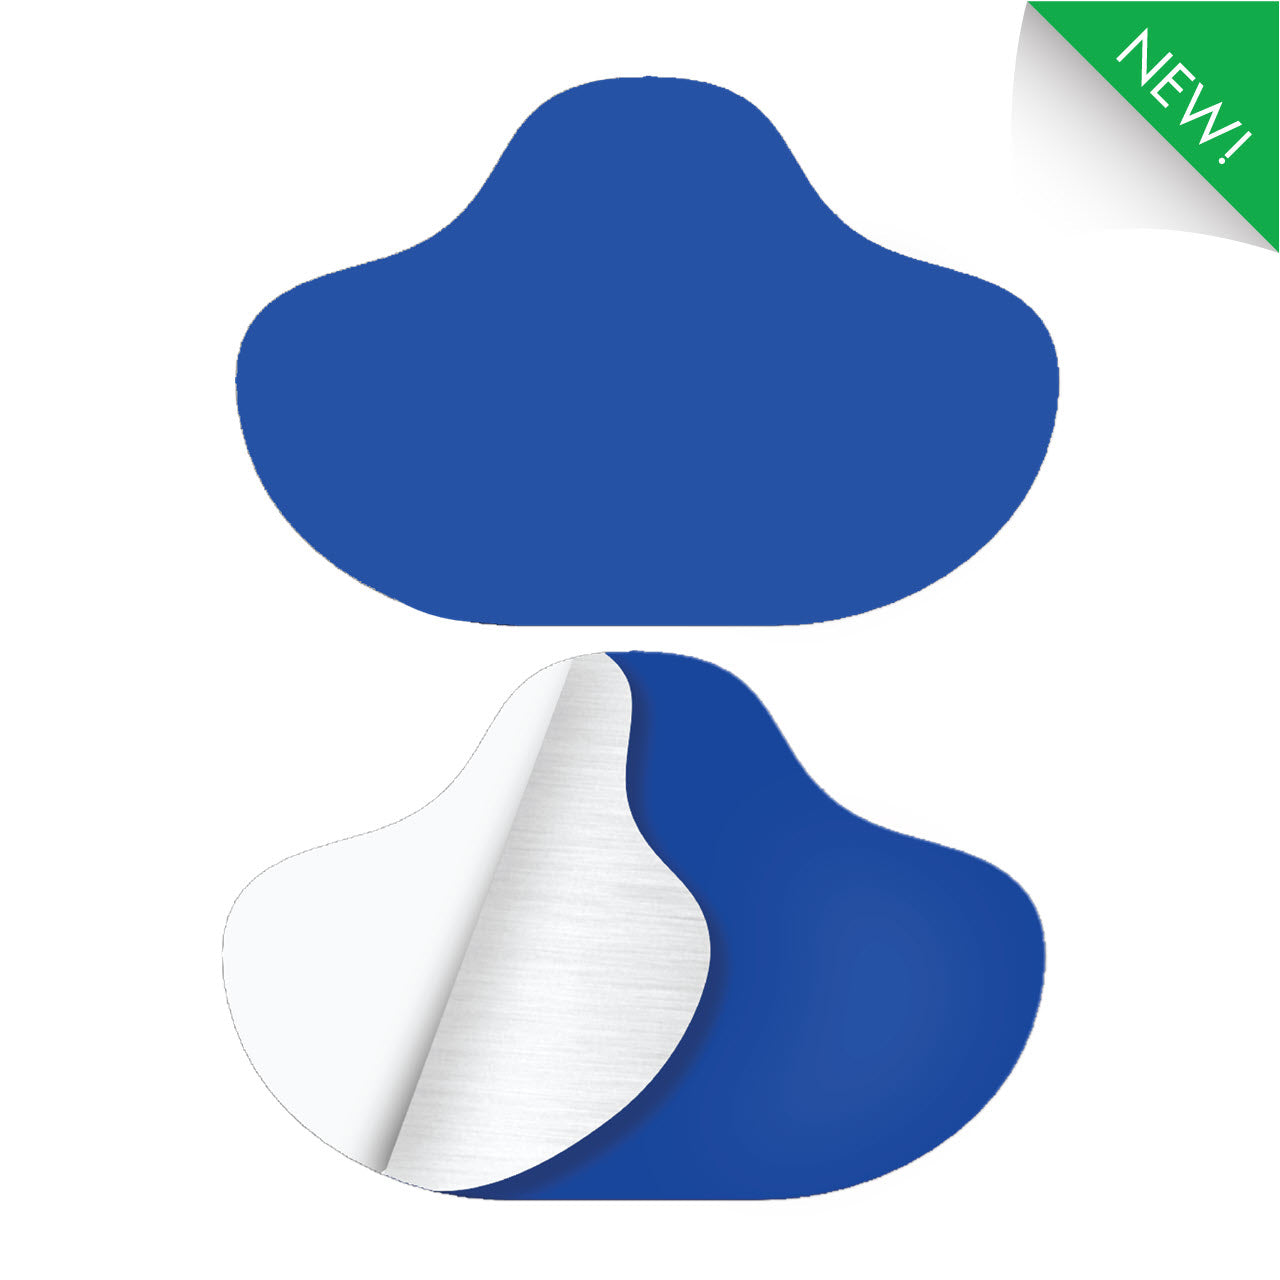
5) Gel Toe Caps Or Sleeves
The gel material in these is an excellent absorber of blister-causing shear, thanks to its very low shear modulus. Gel toe caps are like a little sock for an individual toe. It's closed in at the end so it can protect right up to the tip of the toe. Gel toe sleeves on the other hand are open at the end but still protect most of the toe. Make sure you get the ones have gel all around, thereby providing 360 degree toe protection. They encapsulate the soft tissue component of the toe too so it’s not getting “trodden on” as much with each step. Read more about how gel toe protectors work here.
NOTE: Some people find gel toe protectors make the skin too sweaty; and I have seen this happen. But I have seen ultramarathon runners wear them for 24 hours straight without skin maceration. Like everything, experiences are very individual. We have the BlisterPod brand of gel toe protectors. They have a deluxe double-thick gel layer compared to all other brands and they have been designed with stubborn pinch blisters between toes top of mind. Too often, a thin layer of gel just isn't enough. Keep in mind though, you won't be able to have one on every toe - all that bulk simply won't fit in your shoe. Also keep in mind, this is a PREVENTION ONLY. If you already have a blister that is torn or deroofed, a gel toe protector will mkae things worse. The weepiness from your blister will macerate the surrounding skin, so please only use preventively.
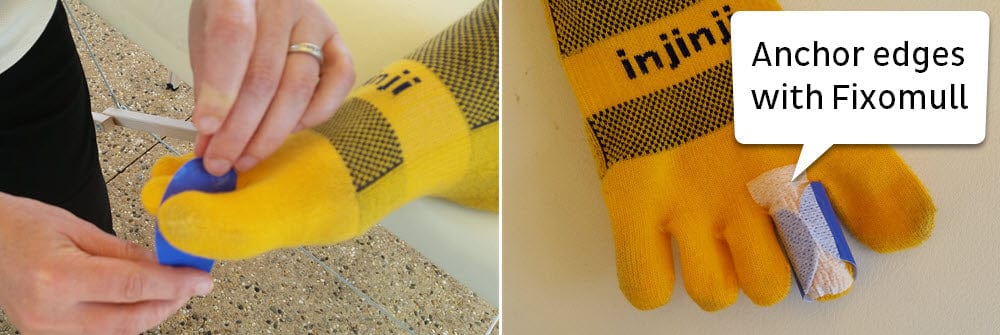
6. ENGO Patches on Toesocks
This is an advanced strategy that works brilliantly. I've written at length about the application of an ENGO Patch on toesocks to relieve pinch blisters here so please read this article for more information. If an interdigital blister has already formed, you’ll have a hard time getting much relief. I don’t like using gel toe protectors once a blister is already there as maceration will compound the blister itself. In race situations, the best relief I’ve managed to get with runners who wear toesocks (which didn’t prevent the pinch blister) where we apply a strip of an ENGO Patch to the sock, much like the picture below. You wrap it around the sock so that the ends meet on the top. Don’t apply any compression around the toe, just in case your feet swell further! Just lay it on and press to adhere. You can either cut a rectangle patch into strips, or narrow down one of the oval patches. I've trimmed the sides of a large oval patch in the image below.
It works by reducing friction levels to a degree that you just can't get in any other way. The advantage is it won't take up any room. The rigidity of the patch means there will be less pinching, and the low friction surface means the over-riding toe will slide right off it. The only limitation is it won’t last like ENGO usually does where you put it on the shoe or insole and it lasts for months.
Wrapping up
Pinch blisters between toes are the worst. If you've got that ridge of pinch callous and you'll be on your feet more than usual soon, be prepared to use one of the preventive strategies outlined to save yourself the pain. I highly recommend gel toe caps - they're excellent!