When blister fluid or blood builds up under your toenail, it's got nowhere to go. It's stuck between a rock and a hard place - your nail above, and the bone of your toe below. When you drill a hole in your toenail, pain relief will be immediate, thanks to the release of pressure. This article outlines the methods of drilling holes in toenails - how the experts do it and how you can do it yourself.
3 Methods To Drill A Hole In Your Toenail
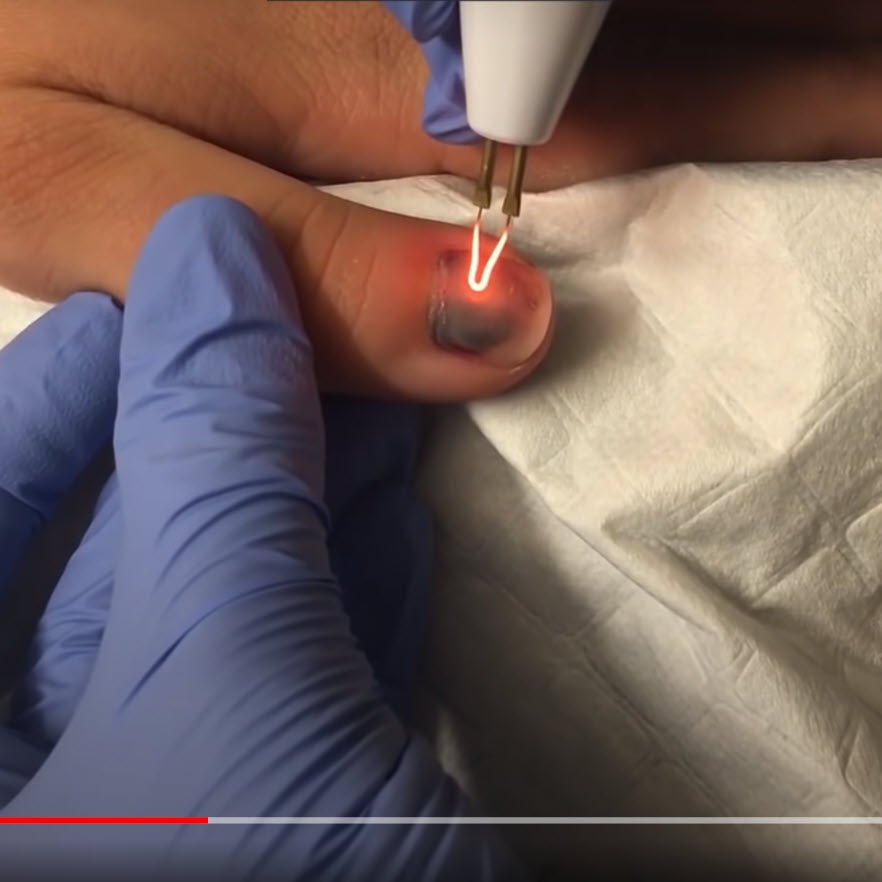
1) Electrocautery
A doctor might drill a hole in your toenail with an electrocautery device. It's called nail trephination. It's so quick, easy and painless. I've never done this - I don't have an electrocautery device. But this video makes me want to get one! Take a look.
2) Podiatry Nail Drill
When blister fluid or blood builds up under your toenail, it's got nowhere to go. It's stuck between a rock and a hard place - your nail above, and the bone of your toe below. When you drill a hole in your toenail, pain relief will be immediate, thanks to the release of pressure. This article outlines the methods of drilling holes in toenails - how the experts do it and how you can do it yourself.
3 Methods To Drill A Hole In Your Toenail
1) Electrocautery
A doctor might drill a hole in your toenail with an electrocautery device. It's called nail trephination. It's so quick, easy and painless. I've never done this - I don't have an electrocautery device. But this video makes me want to get one! Take a look.
2) Podiatry Nail Drill
I’ve drilled a lot of holes in a lot of toenails over the years. As a podiatrist, I have a piece of equipment called a nail drill. I use it every day to file and thin toenails, and it works a treat for drilling holes in nails. It’s not a painful procedure at all. Very little pressure is required for the rotating bit to grind its way through the nail at 25,000 rpm.
My clinical nail drill is far too big to be lugged around; and needs to be plugged into the electricity to work. So for Big Red Run in 2016, I bought a Cordless Dremel Micro as my race drill. It has a rechargeable battery, is light weight, low bulk and rotates at 18,000 rpm. I took care of a few toenails with it (pictured below).
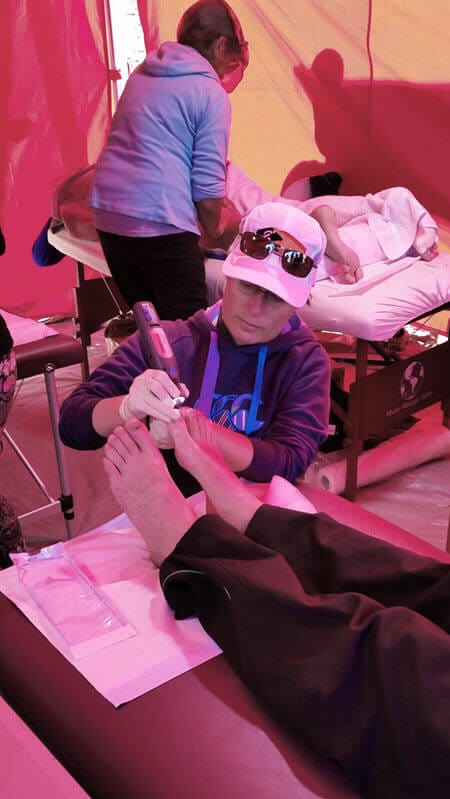
Using my new cordless Dremel for toenail problems
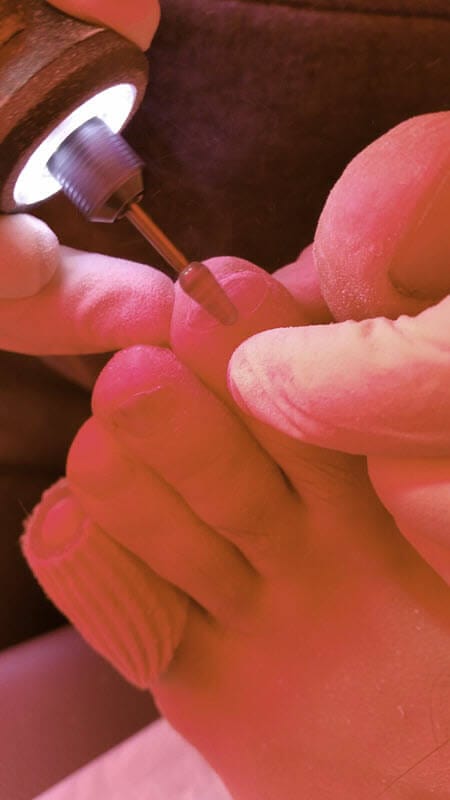
Dremel as a nail drill - in action at Big Red Run 2016
3) Hypodermic Needle
This is the best DIY option for you to drill a hole in your toenail. Mainly because a hypodermic needle, is easy to come by. And cheap. You simply place it on your nail and twist it back and forth until you get all the way through the nail.
You'll find you don't have to press firmly. It's surprising, but only light pressure is needed. It might also surprise you to find it doesn't hurt. Not even when you get all the way through the nail. In fact, blood oozes from the hole before you realise you’re through it. This is thanks to the angle on the pointy end of the hypodermic needle. This allows you to tread carefully for that last little bit as you create a hole big enough to allow the blood and blister fluid to keep exiting.There's nothing inferior about using a hypodermic needle compared to the other methods. But a sewing needle or safety pin is inferior to a hypodermic needle. The hole in the needle and the angle of the sharp tip makes a hypodermic needle the best for this procedure.
Be Brave and Learn to DIY
I think anyone could do this themselves. Toenail blisters and black toenails can be the most painful of all blisters because there’s no room for the fluid to go – there's no room for expansion. The extra liquid volume actually separates the nail from the tender nail bed skin. That’s why it hurts! As soon as you release even a little bit of fluid, there is significant relief.
If you find yourself stuck in the middle of nowhere with a haematoma under your toenail, you'll be glad you packed the right gear and learned how to perform the procedure.
Other Things To Know About Drilling a Hole In Your Toenail
- You may need to make a couple of holes in your nail.
- Your hole(s) may need to be reopened from one day to the next to allow the ongoing release of fluid. It shouldn't take more than a little prod.
- After you've drilled the hole and released the fluid, apply an antiseptic and cover with an island dressing. This will keep it clean and pevent infection.
- To maintain infection control, be sure to use each needle once only. It's no longer sterile once you've used it.
- Dispose of your needle into a sharps container, not into the general waste. If you don't have a sharps container handy, carefully pop the needle back into its protective cover so you can carry it safely until you can.
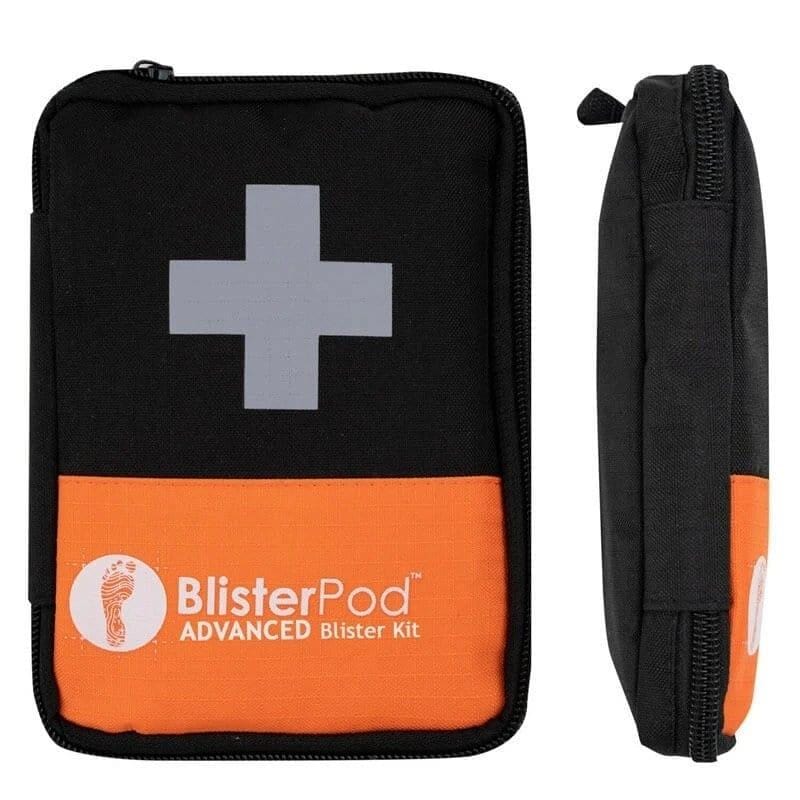
So I recommend you put a couple of hypodermic needles in your blister kit. Not sewing needles or safety pins – I’m talking about the needles they give you injections with. The BlisterPod Sterile Blister Kit has what you need
What Caused Your Toenail Blister (or Subungual Haematoma)
Of course, try to figure out what has caused blister / bleeding and address this as soon as you possible. Otherwise the problem will persist.
- Is firmer lacing needed to keep the toes away from the end of the shoe?
- Is a toeprop required to stop your toes from bending over into a weightbearing position – pressing forcefully into the insole of the shoe? These can be custom-made. Or you can make your own short-term version with orthopaedic felt.
Conclusion
Are you confident enough to drill your own toenail, if the need arises? Of course you are. Just remember to pack some hypodermic needles in your blister kit. Better still, get all the items you need to provide four lancing and blister treatment episodes, without the fear of infection. Get our sterile blister lance pack.
Get Started Now
Using my new cordless Dremel for toenail problems
Dremel as a nail drill - in action at Big Red Run 2016


3) Hypodermic Needle
This is the best DIY option for you to drill a hole in your toenail. Mainly because a hypodermic needle, is easy to come by. And cheap. You simply place it on your nail and twist it back and forth until you get all the way through the nail.
You'll find you don't have to press firmly. It's surprising, but only light pressure is needed. It might also surprise you to find it doesn't hurt. Not even when you get all the way through the nail. In fact, blood oozes from the hole before you realise you’re through it. This is thanks to the angle on the pointy end of the hypodermic needle. This allows you to tread carefully for that last little bit as you create a hole big enough to allow the blood and blister fluid to keep exiting.
There's nothing inferior about using a hypodermic needle compared to the other methods. But a sewing needle or safety pin is inferior to a hypodermic needle. The hole in the needle and the angle of the sharp tip makes a hypodermic needle the best for this procedure.
Be Brave and Learn to DIY
I think anyone could do this themselves. Toenail blisters and black toenails can be the most painful of all blisters because there’s no room for the fluid to go – there's no room for expansion. The extra liquid volume actually separates the nail from the tender nail bed skin. That’s why it hurts! As soon as you release even a little bit of fluid, there is significant relief.
If you find yourself stuck in the middle of nowhere with a haematoma under your toenail, you'll be glad you packed the right gear and learned how to perform the procedure.
Other Things To Know About Drilling a Hole In Your Toenail
- You may need to make a couple of holes in your nail.
- Your hole(s) may need to be reopened from one day to the next to allow the ongoing release of fluid. It shouldn't take more than a little prod.
- After you've drilled the hole and released the fluid, apply an antiseptic and cover with an island dressing. This will keep it clean and pevent infection.
- To maintain infection control, be sure to use each needle once only. It's no longer sterile once you've used it.
- Dispose of your needle into a sharps container, not into the general waste. If you don't have a sharps container handy, carefully pop the needle back into its protective cover so you can carry it safely until you can.
So I recommend you put a couple of hypodermic needles in your blister kit. Not sewing needles or safety pins – I’m talking about the needles they give you injections with. The BlisterPod Sterile Blister Kit has what you need
What Caused Your Toenail Blister (or Subungual Haematoma)
Of course, try to figure out what has caused blister / bleeding and address this as soon as you possible. Otherwise the problem will persist.
- Is firmer lacing needed to keep the toes away from the end of the shoe?
- Is a toeprop required to stop your toes from bending over into a weightbearing position – pressing forcefully into the insole of the shoe? These can be custom-made. Or you can make your own short-term version with orthopaedic felt.
Conclusion
Are you confident enough to drill your own toenail, if the need arises? Of course you are. Just remember to pack some hypodermic needles in your blister kit. Better still, get all the items you need to provide four lancing and blister treatment episodes, without the fear of infection. Get our sterile blister lance pack.